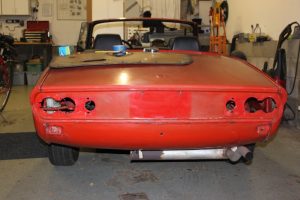
I had another day where it was not excessively hot (in the morning at least), so I got some more sanding done. I did the rear fenders and rear valence. I have sanded everything that can be reached with a 6″ round DA sander, and now I’ll have to do a bunch of inside corners, nooks and crannies, etc. with a smaller sander or by hand.
Author: admin
Some more sanding
One day this week was not excessively hot, so I rolled the car outside and did more sanding. I made a lot of progress on the sides of the hood and the rocker panels.
Too darn hot!
It’s been way too hot to do dirty hard work like sanding! But last week I managed to seal off the passenger compartment with a plastic sheet, so sanding dust would not get into the interior.
More paint removal
I took off the driver’s door and put it on sawhorses, which made it easier to sand it. I didn’t try to remove all the old paint, but I made sure to sand completely through the old repaint job, and well into the original paint. Fortunately the original paint is still quite good beneath the surface- there isn’t really any peeling, cracking, rust bubbles, etc. The only exception was the trunk lid, which I took completely down to the metal, and of course the places where I needed bare metal do do dent-pulling or welding. I have to spend maybe 10 or 15 solid hours with the sander do do the entire car. It’s just noisy, dusty, uncomfortable work…
Stripping
The paint on the trunk lid was in really bad shape, so I took the lid off the car and used paint stripper to completely remove all the old paint. It also needed some sanding to deal with the spots the stripper didn’t completely take care of.
I also started sanding the hood. I noticed that the paint thickness is very uneven- some parts needed tons of sanding to get through the topcoat to the primer, but other parts were down to the metal after a few seconds. I still need to decide if I want to remove all the paint, or just sand it enough to get rid of the deteriorated top layer.
Fixed all the dents
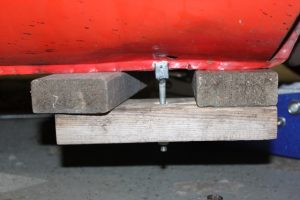
To fix the dent on the bottom of the rocker panel, I made a special puller attachment from some bits of scrap metal. It got clamped to the seam at the bottom of the rocker panel, and it was able to pull it down to the correct position. Then I used the stud welder to pull out the dented portion of the rocker panel.
I also welded a couple of small cracks in the hood, and filled in the holes in the driver’s door where the rear-view mirror had been attached.
The car is just about ready for pant removal, which is a messy job. I already have the new primer and filler, so there is nothing to wait for, except finding the time.
Fixing dents
I got the last of the removable pieces off the car: the door latches, window seals, and gas filler. I also spent some time cleaning the residue of sealer and wax that was underneath most of the things I took off the car.
After that, I starting fixing a few dents: I sanded off the paint surrounding each dent, and used my stud welder to attach studs to pull out the dented areas. I still have to deal with one problematic dent on the bottom of the right rocker panel, just behind the front wheel. It was created about 20 years ago when I accidentally drove over one of those cement “logs” in a parking space. I will have to pull it downwards, which is hard because the car is so low to the ground. Once all the dents are fixed, I need to fill in the holes in the driver’s door where various rear-view mirrors were attached at one time or another, and weld a couple of little cracks in the hood next to one of the headlights.
Taking off more stuff
I’ve got almost everything removed: the front valences and grill, the snaps for the top, the bumpers, all the lights, all the trim and badges, etc. The only things left are the door handles and outer window seals. To remove those, I’ll have to take off the interior door panels.
I will also need to clean off a lot of sealant and greasy grime that was underneath all those items.
When you look at the virgin paint that was covered up by all the things I removed, you can really see how bad the paint had gotten…
Taking stuff off the car
On day one, I removed the windshield, so I can properly paint around it and replace the rotting rubber gasket. I also removed the headlight assemblies and the front side marker lamps.
Last week I got a nice replacement windshield gasket, and new gaskets for the headlights. It’s nice that I can actually get good-quality reproductions of these parts. A lot of the original rubber is crumbling, and has paint on it from some long-ago quickie paint job.
I’m going to paint the Spitfire
After thinking about it for ten years or so, I’ve decided to paint my Spitfire. It will be a break from working on the Ford for the next few months. I don’t want it to turn into a big frame-off restoration project, but I want to give the car a better paint job than it got from some previous owner, maybe 25 years ago. I’ll be removing the windshield, lights, trim, bumpers, etc., but I won’t be worrying about the under-hood area. Obviously I have all the tools and equipment that I got for doing the Ford, so I just have to buy paint and some replacement rubber parts.
I’ll single stage acrylic urethane paint like I used for the Ford, but I will probably buy a less expensive brand than PPG Concept. I will be duplicating the original color, which is an orangeish-red they called “pimento”.

